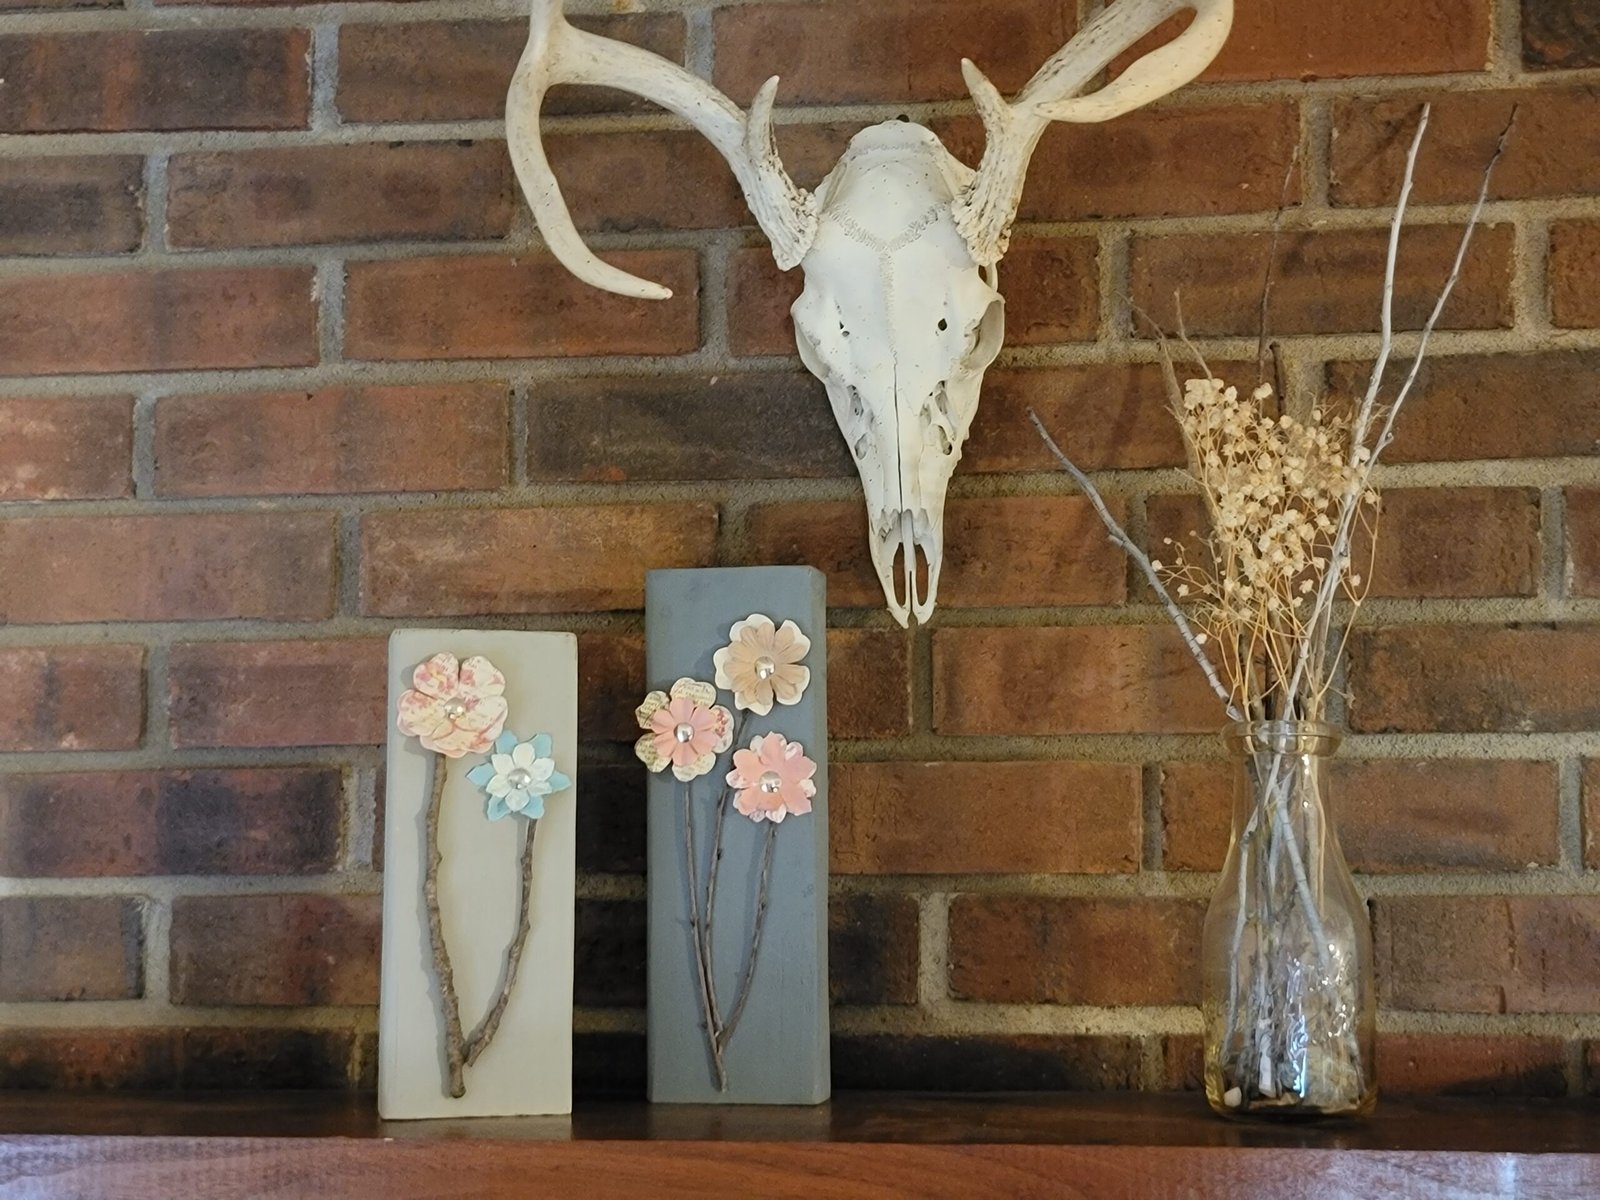
Looking for a simple and quick Springtime craft? This 2×4 scrap project is one of my favorites! Between my husband and I, we have our fair share of 2×4 scrap pieces. If that is not the case for you, ask a friend or post on social media that you are in need of unwanted 2×4 scraps. Or, if you love this project, simply go buy a 2×4 at your local hardware store! Here is your supply list:
- 2×4(s) – 1 or more (whatever length you have -or- whatever length you desire. The 2x4s pictured are 9″ and 10 1/2″)
- Sand paper – Medium Grit 100- 150grit (or anything finer if that is what you have)
- Paint Brush or Foam Brush
- Paint – Choose any color acrylic paint. I liked the neutral grays because it goes with the decor in my home and makes the paper flower colors pop. You choose whatever color works best for you!
- Sticks- I sent the kids out to pick up whatever they could find on the ground. The kind or size is up to you and the look you are going for to turn these into ‘stems’.
- E6000 Craft Glue – Every crafter NEEDS this glue! It’s absolutely one of my favorites, especially for hodge-podge materials like this. You can pick this glue up from your local hardware or craft store.
- Thumbtacks – You will only need as many of these as the number of flowers you choose to add to the project. You can pick them up at your local store. (You could also use upholstery brads if you have those instead.)
- Paper Flowers – Most of the time you can find these in the scrapbooking/card making section of a craft store. You can also purchase these here. Or if you are feeling extra crafty, you can cut out your own paper flowers! *Note- the flowers I used for this project is from a batch I purchased 2 years ago. Not sure they still make the same exact ones pictured however they have the best ones at Michaels Craft Supply Store.
Directions:
1) The first step is preparing your wood 2×4. It’s your judgment call on how much you need to sand your piece of wood. You just need a debris free somewhat smooth (doesn’t have to be perfectly smooth unless you want it to be) surface. After sanding any rough spots or splintered edges, you can use a damp cloth to wipe off the sanding dust. If you prefer to use a tack cloth or denatured alcohol, then that’s okay too. Use the method that works best for you. I actually liked a little texture on the wood, so I wasn’t extremely particular about this part.
2) Now for the fun part! (Anytime I can paint, I get giddy like a school kid!) Grab that paint brush or foam brush and get to painting that 2×4 piece. I painted mine a solid color, but this is where your creativity can come into play. You can choose to paint each side of the 2×4 a different color, you can create an ombre affect, you can add texture with different brush strokes, the list could go on and on! Just have fun and do what feels right!
3) After your paint has completely dried then it’s time to layout the placement of stems (aka. sticks) and paper flowers. You may want to cut or break your sticks into a few different lengths so that the height of each flower is slightly different. This adds more interest to your project. You can also layer your paper flowers to give them a 3D pop. I used a larger flower in the back and placed a smaller flower on top to add this dimension.
4) Once you have decided where you want things to go then it’s time to grab your glue. Be warned, don’t squeeze the E6000 too much or it will be like watching an eruption of glue in slow mo….not the kind of mess ya want to clean up I promise! This glue is rather hefty so lightly apply it to your sticks and place them in the planned location. Hold and count to 10. That should technically be long enough to set the glue but if your stick has an attitude and doesn’t want to lay as flat as you want it to then you may need to place another 2×4 or something weighted to keep your stick adhered to your project. I would recommend letting it sit with the weighted object on top for at least 5- 10 mins. Cue the snack and potty break!
5) Grab your tack and push it in the center of your paper flowers, exactly where the pistil (the pollen covered part) would be. Now your tack becomes the pretty and shiny center of your flowers and also serves the purpose of keeping them in place. You can drop a dab of glue where you plan on putting your flower just in case. Then push the tack with the assembled flower into the wood. It should push in by hand without an issue but if your 2×4 is harder than mine was you can take a small hammer or handle of a screwdriver and beat that bad boy in!
6) Now, last but not least, step back and enjoy your cute piece of Springtime art and decide what part of your house is worthy to showcase this new masterpiece!
I hope you enjoyed this simple project as much as I did and please feel free to share YOUR photos! Let us see how you made this project creative in YOUR own way!


Leave a Reply